![]()
Oxy-Acetylene Welding
Lighting the Torch
1. Switch from clear goggles to properly shaded gas
welding goggles. Always wear your goggles before lighting the torch.
Some welders are in the habit of lighting the torch and then putting on
the goggles. I'm afraid they may
end up with cataracts or other eye problems.
If you
can't see your surroundings fairly clearly, use more light. It is important to see things you could trip over, things
that may catch on fire, etc. In
fact, make sure your environment is clean.
No tables with sharp edges, no ball bearing on the floor, no skateboards
under the edge of the workbench, etc. Also
scout your environment for flammable things.
Remove rags, cans of oil, solvent-soaked bike parts, greasy tools,
plastic handles, books, newspapers, and such things for a distance of at least
15 feet around your work area
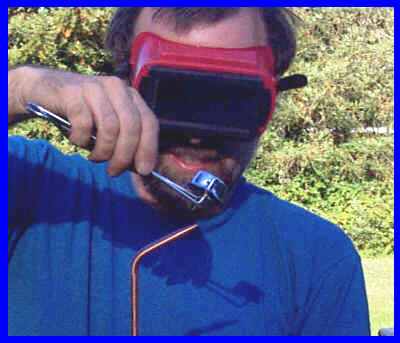
The author lights a torch wearing appropriate goggles.
2. Install a #2 torch tip if you have one. Open the
acetylene knob on the torch until you barely hear gas flowing out of the torch
tip. Using a spark lighter (not a
match, cigarette lighter, or pilot light starter), ignite the gas flowing out of
the tip. Put down the spark
lighter, and lightly close the acetylene knob.
If you hear a loud pop, do not be alarmed. As soon as the flame is extinguished, take off your goggles
and look at the air around you. You
are likely to see carbon dust floating in the air.
This is a by-product of burning pure acetylene, and as you can guess, is
quite messy. So, let's ignite the
torch in a better way:

A #2 torch tip, burning acetylene with no oxygen
2a. Open the oxygen knob until you just barely hear
oxygen escaping from the torch. Open
the acetylene knob until you hear the gas flow increase. Ignite the flame, then immediately turn off the torch by
lightly closing the acetylene valve, and then the oxygen valve.
The fire may have burned in several ways.
* If the fire kept blowing away from the torch tip, with
a clear gap between the tip and the flame, wouldn't stay lit, or wouldn't light
at all, your knobs were too far open, allowing too much gas to flow.
* If the fire popped (before you turned it off), or if
it disappeared, and you heard a whiny hissing sound, your knobs were not open
enough. The flame was burning inside the torch tip. The fire will quickly melt the inside of the torch tip, and
should not be allowed to happen very often or for very long.
* If the fire was all orange, you didn't have enough
oxygen, and you may have filled the air with messy carbon.
* If the fire was small, all blue or nearly clear, and
maybe even sparky, you had too much oxygen in proportion to acetylene.
This can overheat the torch tip and should be avoided.
You may have noticed how long the flame was.
The hottest part of the flame is the inner blue cone about 1/4"
(6mm) from the torch tip. However,
a flame sufficient to set things on fire can extend out as much as 18"
(46cm) from the torch tip, so be careful who you aim that thing at.
I have seen welders forget, and just waving their torch around, using the
flame to point at things, etc. Not
a great idea! Also, never set a
burning torch down. Turn it off
first - you'll be glad you did.
Also consider just how hot that torch is.
The tip of the inner blue cone can reach 6300 degrees Fahrenheit (3500
Celsius). That's 1/2 the heat of
the surface of the sun. If you should happen to brush it across the back of your hand
as fast as you possibly can, you'll be severely burned. Don't try that at home.
If you are unsure about everything you have done to this
point, ask an experienced welder to check out your system, and observe your
torch lighting technique.
2b. OK, time to stop fooling around, and light the torch properly. Light the torch with an adequate amount of acetylene, and some oxygen to avoid the carbon dust in the air. Adjust the flame so that it is fairly quiet, and so there is a distinct inner blue cone about 1/4" (6mm) long at the torch tip. Now, slowly adjust the torch knobs until there is a short, lighter blue feather at the tip of the cone.
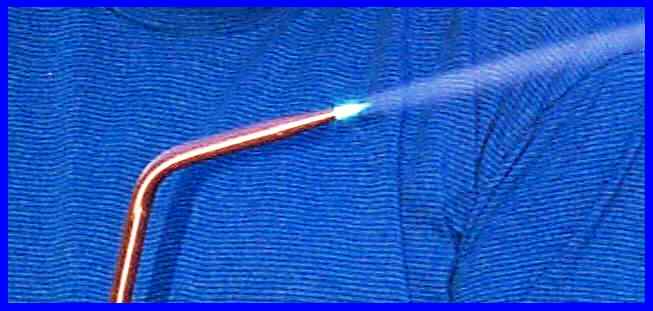
The camera sees the inner cone as white, but in goggles, it will appear bright blue.
See the outer feather?
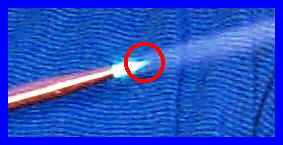
Continue adjusting the torch knobs until the blue feather just disappears. This is a 'neutral' flame. The blue outer feather means that you are giving it too much acetylene. It is harder to see an oxygen-rich flame. The cone is smaller. Since it is hard to see the oxygen-rich condition, you purposely add a bit too much acetylene to see the feather, then turn the acetylene down until the feather just disappears.
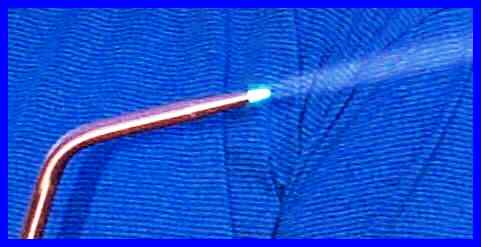
Neutral flame
Because the bright blue inner cone is too bright for the camera, it appears fuzzy in this picture.
Remember:
* If there is a gap between the flame and the torch tip,
you have too much gas flow overall.
* If the flame pops, disappears, or wheezes, you have
too little gas flow overall.
If the flame is hot enough to melt steel, why doesn't it
melt the torch tip? The unignited
gas flowing through the tip keeps it cool.
Sometimes when you light a torch, the inner blue cone is misshapen. When this happens, you need to clean the tip.
If you have any questions at this point, ask a
professional welder. This is
serious business, and you can get hurt if you make assumptions or mistakes.
Go ahead and fool around with the torch flame adjustment as long as you want. You may think you are wasting expensive gases, but even a fairly small tank set will last hundreds of hours when using a small (#2) torch tip.
![]()
![]()
Oxy-Acetylene Welding Main Menu
Tell a Friend About BikeWebSite
Please feel free to link your web pages to www.bikewebsite.com - Thanks!
![]()
Copyright © 1991-2014, bikewebsite.com