"Save Big With Bicycle Discount Coupon Codes"
Bicycle Tune-Up Step 2 - Bottom Bracket Adjustment
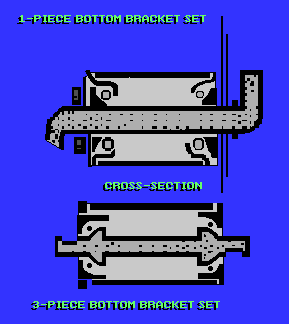
There are several design variations of the bicycles bearings between the pedals, called the bottom bracket, or crank bearings. Whatever type you have, the adjustment is performed in the same way, however:
If your bike has sealed, non-adjustable bottom bracket bearings, skip ahead to the information below about bicycle cranks and bicycle pedals. Many modern bikes have sealed bearings, but they may still require adjustment.
Loosen the bike's outer locknut or ring (which is left-hand threaded on most American-made bikes, so to loosen, you'd turn it clockwise), turn the inner nut or "cup" to get the proper adjustment, and then re-tighten the locknut or ring. You may need to try this several times to get it right. Check the adjustment with the chain off. There should be no bearing looseness and yet the cranks should spin freely.

![]()
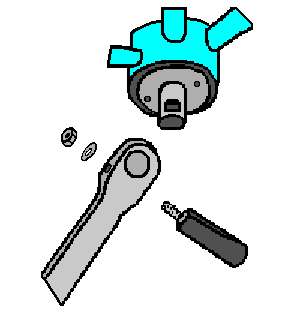
Many older style bikes have crank cotters. These are special bolts with a tapered, flattened side. One goes through each crank, holding it to the crank axle ("spindle"). In time they become worn, which causes a clunky looseness as you turn the pedals. To replace a cotter, remove the nut, and carefully hit the threaded end with a hammer. Normally, the cotter will slip out of its hole. If it doesn't, try to avoid killing it with your hammer. You may need to heat up the crank, or drill the cotter out. Put grease on the new cotter, tighten the nut on, tap it lightly with a hammer and retighten it. Cotters are soft steel, so don't overtighten the nut.

More about crank cotters
![]()
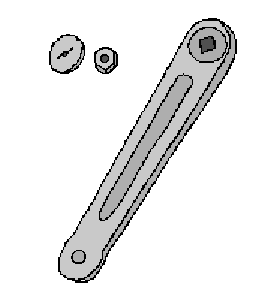
Many newer bikes have "cotterless" cranks. These have a bolt or nut usually under a metal or plastic cap on each side. These bolts must be kept tight or you can damage the cranks. Check these bolts every month or two. Cotterless cranks cannot be removed reliably without a special tool available at bike shops. Fortunately, this tool is low-cost, generally under twenty dollars.

Cotterless Crank - Keep the nuts tight!
![]()
Pedals
Check that the pedals are tight on the cranks, especially in the winter. The left side pedal is always left-hand threaded. Turn it the opposite of a jar lid to remove or put on.
If you remove pedals, you should put a thin coat of grease on their threads, because pedals in contact with cranks for a long time tend to become stuck due to rust or electrolytic action.
If you have a stuck pedal, put a wrench on it, and bang on the end of the wrench with a soft hammer. Wear goggles, since the wrench may jump or chip. Do not use a wrench you care about, because it may stretch or break. Bicycle shops can sell you a long pedal wrench which gives you more leverage, and is especially thin to fit on some pedals which do not have much room for a regular wrench. If you have a pedal you want to remove which is very resistant, heat the end of the crank. Heat the crank only until a drop of oil applied to it starts to smoke. Any more than that, and the heat may destroy the metal of the crank.
It is very important not to mix up the pedals, since the left pedal is left-threaded. Putting the wrong pedal on the wrong crank can damage the threads. Most pedals are marked with an "L" and an "R" to help you distinguish.
3 Things You Need To KnowBefore You Buy
![]()
Back - Headset & Stem Adjustment
Next - Front Wheel Bearing Adjustment
Tell a Friend About BikeWebSite
Please feel free to link your web pages to www.bikewebsite.com.
![]()
Copyright © 1991-2014, bikewebsite.com